
Contact Tags
Tags are colored labels you apply to an external contact to classify them — “hot lead”, “customer”, “awaiting payment”. Unlike Notes (free-form key/value text), a tag is a short, visual marker that is reusable across the whole organization: you create it once and apply it to as many contacts as you want.
Because they belong to the contact, tags follow the person across conversations and channels — if the same contact comes back later, the tags are still there. The end user never sees the tags; they are an internal organizing axis for your team.
Where tags appear
Section titled “Where tags appear”Tags are visible in two places in the admin panel (/admin/conversations), and only for external conversations (WhatsApp, Telegram, Instagram, public chat, widget, and the API channel). Internal Hub conversations have no external contact, so they have no tags.
In the right panel of a conversation, between Info and Notes, the Tags block shows the labels applied to the contact plus an Add button:
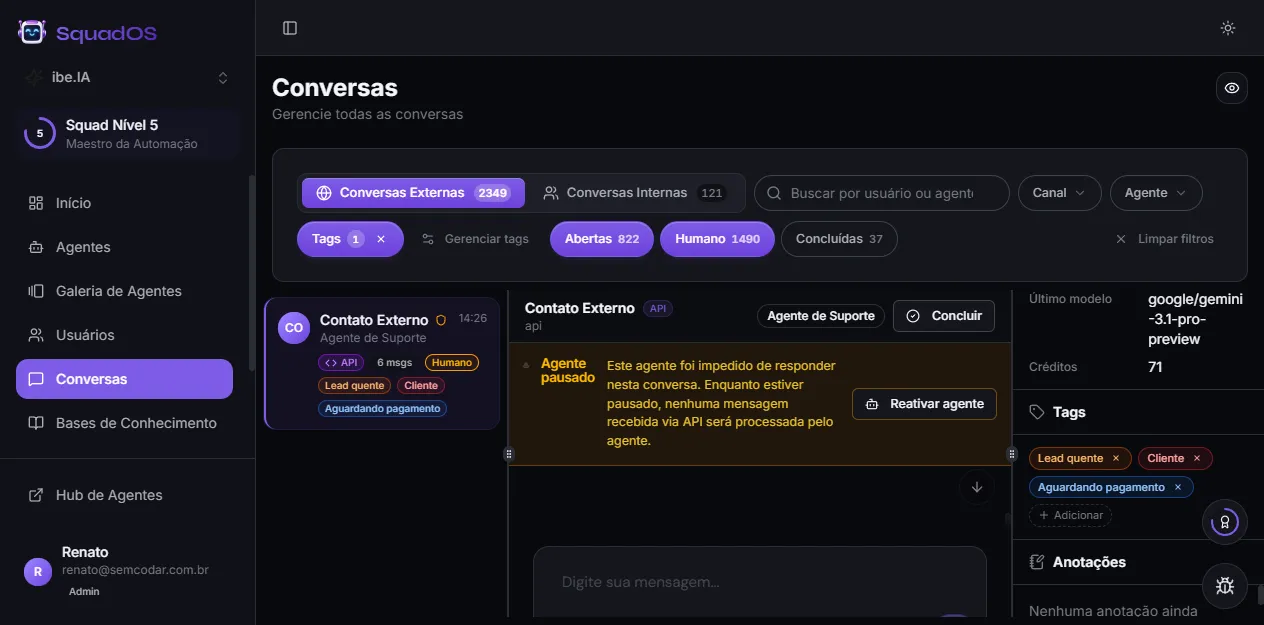
And on each card in the conversation list, the contact’s tags appear as colored chips below the agent name:
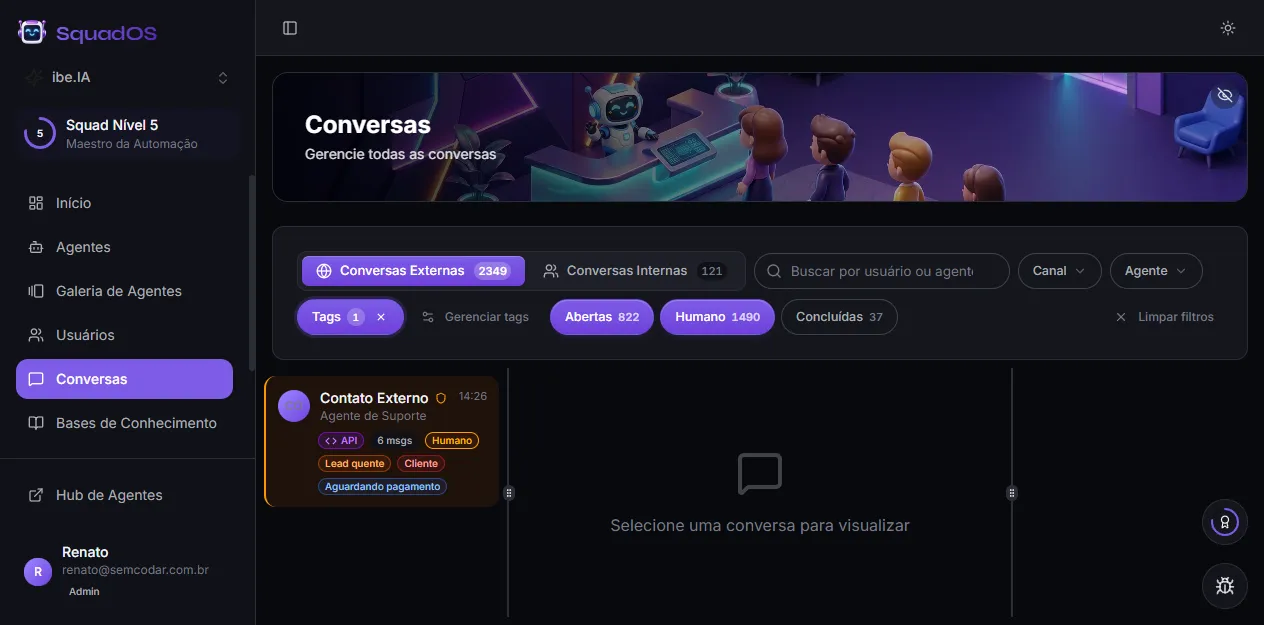
Applying and removing tags
Section titled “Applying and removing tags”In the Tags block of the contact panel:
- Click Add.
- In the search field, type the tag name.
- If the tag already exists in the organization, it appears in the list — click to apply it.
- If it doesn’t exist, a Create ”…” option (with the typed name) appears — click to create and apply it at once.
- To remove a tag from the contact, click the × next to the chip name.
When you create a new tag, SquadOS assigns a color automatically from an 8-color palette. The same name always gets the same color — you can change it later in the catalog (see below). Removing a tag from a contact does not delete the tag from the organization: it stays available for other contacts.
Filtering conversations by tag
Section titled “Filtering conversations by tag”On the External Conversations tab, the Tags filter narrows the list to contacts that carry the selected tags. It’s multi-select — pick one or several:
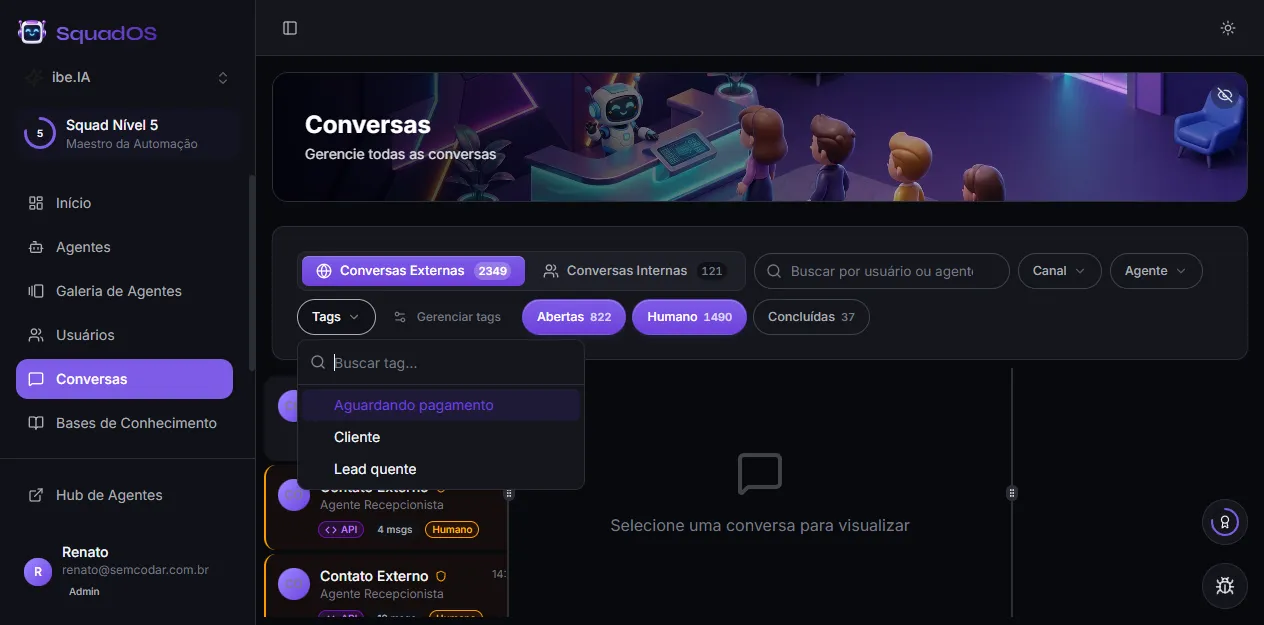
Like every inbox filter, the selection goes into the URL, so you can save and share the link to a specific view (e.g. “all hot leads awaiting payment”).
Managing the tag catalog
Section titled “Managing the tag catalog”The Manage tags button (next to the filter) opens the organization’s tag catalog. There you administer each tag, regardless of which contacts it’s applied to:
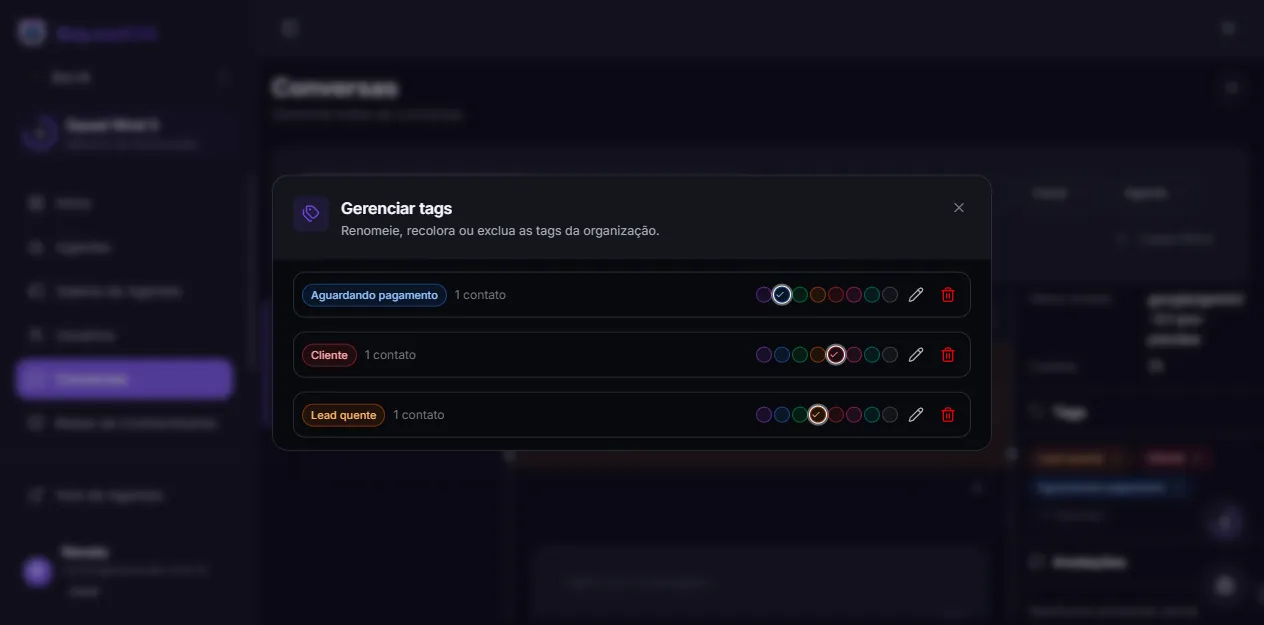
For each tag you see how many contacts use it, and you can:
- Recolor — click one of the 8 palette colors to change the tag’s color (the change applies to all contacts).
- Rename — click the pencil, edit the name, and confirm. Two tags cannot share the same name.
- Delete — click the trash icon. The tag is removed from the catalog and from every contact that had it. This action cannot be undone.
The three ways to apply tags
Section titled “The three ways to apply tags”Tags can be applied through three paths, all sharing the same catalog:
- Manually, by your team, in the contact panel (described above).
- By the agent itself, via the Contact Tags native tool — the agent can view, apply, and remove tags during the conversation (e.g. mark “hot lead” when the customer shows interest).
- Via the API, through the Tags endpoints — useful to sync with a CRM or bulk-apply tags from another system.
Who can use tags
Section titled “Who can use tags”Applying, removing, and managing tags requires the collaborator role or higher (collaborator, admin, or organization owner). Members with the plain user role cannot change tags. See the permissions table for the detail of each role.
Best practices
Section titled “Best practices”- Few tags, well defined. A handful of clear tags (“lead”, “customer”, “VIP”, “awaiting payment”) organizes better than dozens of near-duplicates. Before creating a new one, check whether an equivalent already exists in the catalog.
- Standardize with the agent. If you want the agent to apply tags on its own, describe in the prompt when to use each one (“tag
hot leadwhen the customer asks for a quote”). Without that, the agent uses the tool sporadically. - Use the filter as a work queue. Combine the tag filter with the Human state to isolate, for example, every customer who needs a person and is already marked as priority.
- Keep sensitive data in Notes or secure integrations. Tags are short labels visible to the whole team — not the place for private information.